How to Install TWRP Recovery on Xiaomi PocoX2/Redmi K30
Installing TWRP on your Poco X2 allows you to flash custom ROMs/mods, take NANDroid backups, and even root your phone using Magisk. Through the instructions in this guide, you will learn how to install TWRP recovery on Xiaomi Poco X2. The steps and the files provided in this guide are also compatible with the Redmi K30 which is sold in China.
Xiaomi has a good reputation when it comes to supporting the custom development scene. The Chinese OEM has provided independent developers with almost every new phone they launched in the past. Being its sub-brand, Poco holds the same developer-friendly spirit and recently sent out the newly launched Poco X2 to several developers. The company also released the phone’s kernel source code on the very first day so that the custom development can kick in quickly.
Given that, the first unofficial build of TWRP recovery is now available for the Xiaomi Poco X2 and Redmi K30. The recovery was compiled and released by wzsx150, who is a renowned developer and known for his TWRP builds for other Xiaomi phones. The provided recovery was built specifically for the Redmi K30 but also works on the Poco X2 since it shares almost the exact same hardware.The original source of the recovery is still unknown to me.
So now, if you wish to install custom ROMs/mods or root your phone, then you must first install TWRP recovery on your Poco X2/Redmi K30. The instructions below will guide you through the same.
Prerequisites
Before you head to the download links and instructions, make sure that all the requirements listed below are fulfilled.
- Although installing TWRP will not erase any data, it’s best to safeguard it in case any goes unplanned. I
- In order to install TWRP, you must first unlock your phone’s bootloader. Note: Unlocking the bootloader will erase all data.
- Charge your Poco X2/Redmi K30 to a sufficient battery level so that it does accidentally switches off during the flashing process.
- Download and install the Xiaomi ADB/Fastboot USB drivers your PC.
- Basic knowledge of using command-line .
Instructions to Install TWRP Recovery on Xiaomi PocoX2/Redmi K30
Flashing TWRP is quite easy. You just have to download the recovery image and flash it to your phone’s recovery partition using fastboot. The step-by-step instructions for the same are provided below.
Step 1: Download TWRP recovery for your Poco X2/Redmi K30 on your PC.
Step 2: Create a new folder (For example: ‘TWRP’) on your PC’s desktop and extract the contents of the downloaded file to it. The extracted files should contain the ADB/Fastboot binaries, the TWRP recovery image file, and some flashing scripts.
Step 3: Hold the SHIFT key on the keyboard and right-click on any empty space inside the folder where the files have been extracted. Then select the ‘Open PowerShell window here’ option to launch the PowerShell within the same folder.
If you’re using a macOS/Linux PC, simply launch the Terminal and change its directory to the folder where the files have been extracted. For example, if you extracted the files to ‘<username>/Desktop/TWRP’, then the command to change the directory should look like:
cd Desktop/TWRP
Step 4: Now power off your phone completely and boot it into Fastboot mode.

Step 5: Connect your Poco X2/Redmi K30 to the PC using a USB cable while it is in Fastboot mode.
6: Enter the following command in the PowerShell/Terminal window to ensure that your PC can detect the phone over fastboot:
fastboot devices
The command should return a device ID unique to your phone. If it doesn’t then make sure that you have installed the latest USB drivers on your PC (See the ‘Prerequisites’ section for link).
7: Now, enter the following command to flash and install TWRP recovery on your Poco X2/Redmi K30:
fastboot flash recovery recovery-TWRP-3.4.0B-0209-REDMI_K30-CN-wzsx150.img
8: hold the Volume Up and Power buttons to force-reboot phone into TWRP recovery mode. When your phone boots into TWRP, swipe the button on the bottom of the screen to allow modifications.
Change Language in TWRP to English
If you wish to change the language in TWRP to English, then simply press the button third button in the second row of the main TWRP screen, press the globe icon, select ‘English’ as the language, and finally press the button on the bottom right.
Or, you can just watch the video below.

- With the recovery now installed, you can further use it to take NANDroid backups of the complete OS. flash mods, and even install the Xiaomi EU MiCiU RAM on your Poco X2.
-
If you want to install a custom recovery, custom ROM, or root your Poco X2, then you must first unlock the phone’s bootloader. In this guide, I will show you how to unlock the bootloader on Poco X2 in a step-by-step manner. The process is quite easy and uses the official Mi Unlock Tool for unlocking the bootloader.
So why would you need to unlock the bootloader in the first place? It’s an important question to ask yourself, especially if you’re new to the whole Android modding scene.
Unlocking the bootloader on your Poco X2 will give you a lot of freedom when it comes to the software. You can install a custom recovery like TWRP.flash the most renowned custom ROMs, and even root your phone using magisk. So there’s a lot you can do after unlocking your Poco X2’s bootloader.
Unlike for devices like the Google Pixel series or Xiaomi’s Android One phones, unlocking the bootloader on regular Xiaomi devices running MIUI (Like the Poco X2 in this case) isn’t as simple as executing a Fastboot command from the PC. Although the process isn’t the simplest one out there, it’s still relatively easy once you get the hold of it. I have split this guide and its instructions into different steps for you to easily understand the whole bootloader unlocking process.
More on Poco X2:
- Since the kernel source code is available already.we might soon a dedicated official build of TWRP for the phone soon, as well as some popular custom ROMs like HavocOS, Pixel Experience, and more.
-
A Comprehensive Guide to Unlock the Bootloader on Poco X2
Requirements
- A Windows PC and a good quality USB-C cable, preferably the one that came in the box.
- The bootloader unlocking process will erase all the data stored on your phone. This includes the contacts, messages, call logs, apps, and everything stored on the internal storage as well. So, make sure that you have taken a complete backup of all your important data beforehand so that you can restore it after the bootloader has been unlocked.
- Make sure that your Poco X2 is charged to a sufficient battery level to avoid any sudden disruptions during the process.
- Download the Xiaomi ADB/Fastboot USB drivers and install them on your PC. This will ensure that your phone is properly detected by the PC when in Fastboot mode.
Once you have made sure that the requirements listed above are met, head to the instructions below.
Steps to Unlock Bootloader on Poco X2
In brief: The first step is to enable the hidden ‘Developer options’ in the phone’s settings menu and then enable the ‘OEM Unlock’ toggle within it. Once that is done, the second step is to bind your Mi account to the phone, which is mandatory to make your Poco X2 eligible for bootloader unlocking. After the account binding, the third and final step is to unlock the bootloader on your Poco X2 using the Mi Unlock Tool.
Make sure that you follow the steps in the given order. Also, it would be wise if you go through the listed instructions under each step so that you can have a clear picture of the whole process that you’ll perform.
Step 1: Enable ‘OEM Unlocking’ on your phone
‘OEM Unlocking ‘ is located inside the ‘Developer options’ on your phone. Enabling it is necessary if you wish to unlock the bootloader on Poco X2 and further perform procedures like installing TWRP, rooting, etc. Without OEM Unlocking, you will not be able to execute any fastboot flash commands on your device.
- Go to ‘Settings‘ > ‘About phone‘ on your Poco X2.
- Continuously tap on the ‘MIUI version‘ section for five (5) times to enable the hidden ‘Developer options’.
- You should see a ‘You’re now a developer!‘ toast notification that indicates the said options have been successfully enabled.
- Now, go to ‘Settings‘ > ‘Additional settings‘ > ‘Developer options‘.

- Scroll through the list of items, find ‘OEM unlocking‘ and turn on the toggle next to it.
- Tap on ‘Enable‘ when prompted to finally enable OEM Unlocking on your Poco X2.

Step 2: Bind your Mi Account to your Poco X2
In order to unlock the bootloader, you must first associate/bind your Mi account to your phone. This could be done through the ‘Mi Unlock Status’ menu within the ‘Developer options’.
First off, make sure that you have a Mi account. If not, you can easily sign up for it on the official page . Second, insert the SIM card into your Poco X2 with the same phone number that you used to sign up for your Mi account. Once you have that, disconnect your phone from WiFi and use carrier mobile data hereafter. All these things are equally important for successfully binding your account.
To bind your Mi account, go to ‘Settings‘ > ‘Additional settings‘ > ‘Developer options‘ on your Poco X2. Now, tap on ‘Add account and device‘ and log in to your device with your Mi account. You should then see ‘Added successfully. Mi account is associated with this device now.‘ toast notification on your phone’s screen.
Ad by ValueimpressionA few notes:
- If you see ‘Connect to the network and try again‘ message, again, make sure that you turned off WiFi on your phone and enabled mobile data.
- If you forgot your Mi account’s password or see the 8612 error message, do not attempt to re-add your account again and again. Doing so may block your Mi account temporarily. Instead, just wait for 7 days and then retry again.
Once your account is successfully associated with your phone, head over to the next step.
Step 3: Unlock the Bootloader on your Poco X2
With your Mi account now successfully bound to your Poco X2, follow the instructions below to finally unlock the bootloader.
- First, power off your Poco X2 completely and boot it into Flashboot .
- Connect your phone to the PC while it’s in Fastboot mode.
- Now, download the Xiaomi Mi.
- Extract the downloaded ZIP file and launch the tool by double-clicking on the ‘miflash_unlock.exe‘ executable file.
- Log into your Mi account in the tool’s GUI.

- The tool will now verify your phone to check if it’s eligible for bootloader unlocking.
- Upon successful verification, the tool should show ‘Phone connected‘.
- Note: If you see any error messages in Mi Unlock Tool, refer to the common errors listed right below the instructions.
- Now click on ‘Unlock‘. The tool will prompt you with a confirmation message.

- Finally, click on ‘Unlock anyway‘ to confirm and unlock the bootloader on your Poco X2.
The unlocking progress shall be shown in the tool’s GUI. The process should take a few seconds to finish, during with all the data on your phone will also be erased. You should then see the ‘Unlocked successfully‘ message in the tool.
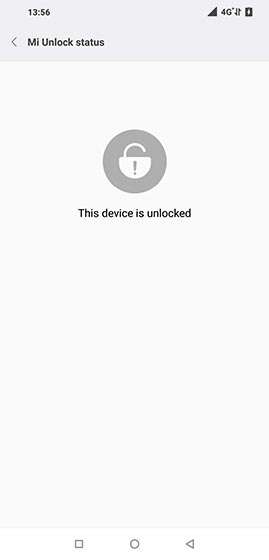
Once finished, click on ‘Reboot phone‘ in the tool to reboot your Poco X2 into the system (OS). You should see the unlocked bootloader warning message on the screen, which indicates that the process was successful. Once the phone boots, follow the on-screen instructions to set up your phone and add your Google/Mi accounts.
Common Error Messages in Mi Unlock Tool
- ‘Not connected to the phone‘: If you see this message, it means that the tool has failed to recognize your phone. This is majorly due to missing drivers. So make sure that you have the latest Xiaomi ADB/Fastboot USB Drivers installed on the PC and retry.
- ‘Current account is not bound to this device‘: The message means exactly what it says. Your Mi account is not properly bound to your Poco X2. To fix it, reboot your phone back into the OS and refollow the instructions from Step #2 above.
- ‘Couldn’t unlock ‘: This message may further expand to ‘After 720/360/168/72 hours of trying to unlock the device’. While it’s unlikely to get this message, but if you do, make sure to wait for the mentioned time period and then try again.
- Note: Do not log out/remove your Mi account or perform a factory reset on Poco X2.during this waiting period. Doing so will reset the wait timer and you might have to wait for the unlocking permissions for even longer.
With your Poco X2’s bootloader now unlocked, you may now go ahead and install TWRP, flash custom ROMs/kernels/mods, or even root your Poco X2 using Magis